How to fix the “self-assigned IP address” error on Mac
The self-assigned IP address error appears whenever your Mac is not able to connect to the chosen network properly. Read on to find tips on how to fix this issue and avoid it in the future.
Contents
What is a “self-assigned IP address” error?
A self-assigned IP address error is an issue that occurs when the device is not able to connect to a Dynamic Host Configuration Protocol (DHCP) server and assigns an IP address to itself. Whenever this issue arises, the user sees an error message saying, “Wi-Fi has the self-assigned IP address and will not be able to connect to the Internet.”
Typically, computers and smartphones rely on DHCP servers to obtain an IP address on a specific network. However, if for some reason the device cannot reach a DHCP server or it’s not responsive, your Mac creates an ad-hoc network with a self-assigned IP address using the Automatic Private IP Addressing (APIPA) feature. As a result, the device can communicate with other devices on the same network segment through the link-local addressing feature but cannot access the internet or reach devices out of their network’s range.
A self-assigned IP address signals a connectivity issue with either your DHCP server, the network, or the system’s firewall configuration.
Causes of the “self-assigned IP address” error
Below are the most common causes behind the self-assigned IP address error appearing on your Mac:
- DHCP server issues. Whenever the device attempts to connect to a server, it sends a request to the DHCP server. However, if the server is down, unresponsive, or unreachable, the device may assign an IP address for itself.
- Network configurations conflicts. Disruptions within the network infrastructure or misconfigured network preferences can impair the device’s connection with DHCP servers. Additionally, misconfigured DHCP servers can lead to incorrect IP address assignments and IP address conflicts when two devices are trying to connect to the same IP address.
- Wi-Fi connection problems. If the device cannot establish a stable connection with the Wi-Fi or router, it may be unable to reach DHCP servers to request an IP address.
- An outdated MacOS. If you’re using an older MacOS version, it may not be fully compatible with the new Wi-Fi standards or network protocols and may struggle to establish a solid connection. This can lead to failed communication with DHCP servers and a failure to obtain a valid IP address.
- Network interface hardware or software problems. Outdated network drivers, network interface card malfunction, or network configuration software issues may create connectivity conflicts between your device and the DHCP servers and deprive your device of a proper IP address.
How to fix the “self-assigned IP address” error
The self-assigned IP address error can appear for various reasons, but you can resolve this issue in a variety of ways. Below is the list of the solutions that will most likely help you. Just keep in mind that you should try them in the provided order.
1. Restart your Mac and router
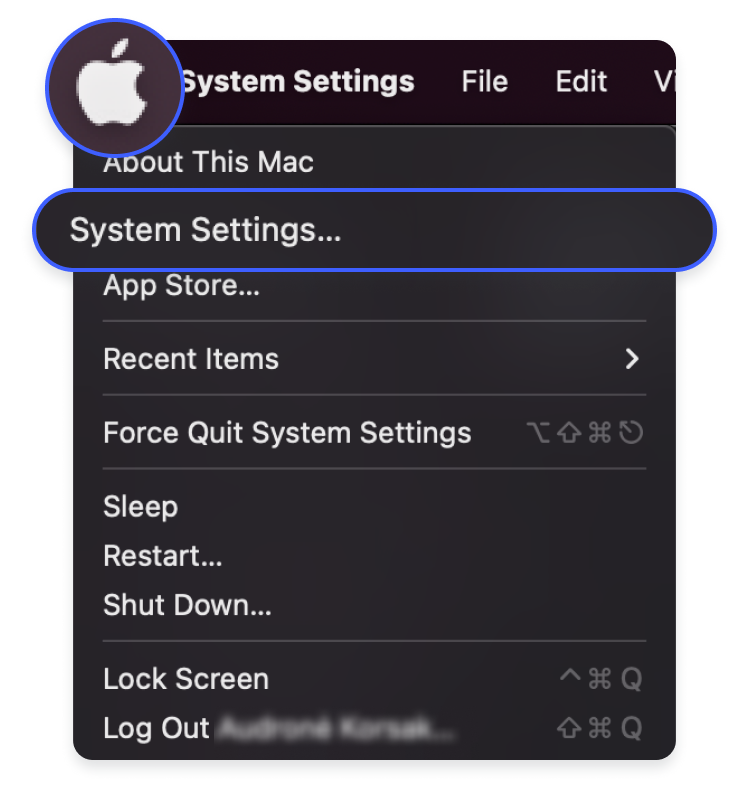
- You can restart your Mac by clicking on the Apple logo and selecting “Restart.”
- To restart your router, turn off the power button, wait for around 30 seconds, and turn the button on again.
2. Renew DHCP lease
- Click on the Apple logo, open “System settings.”

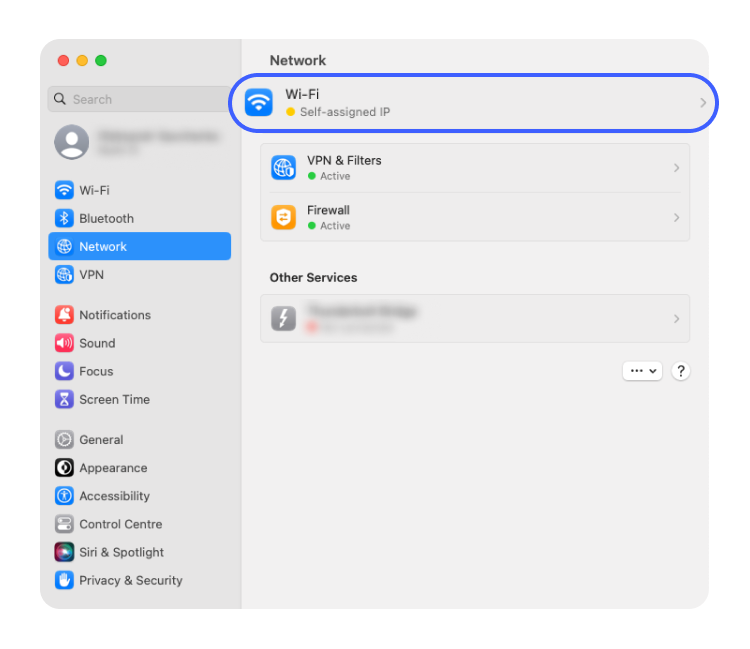
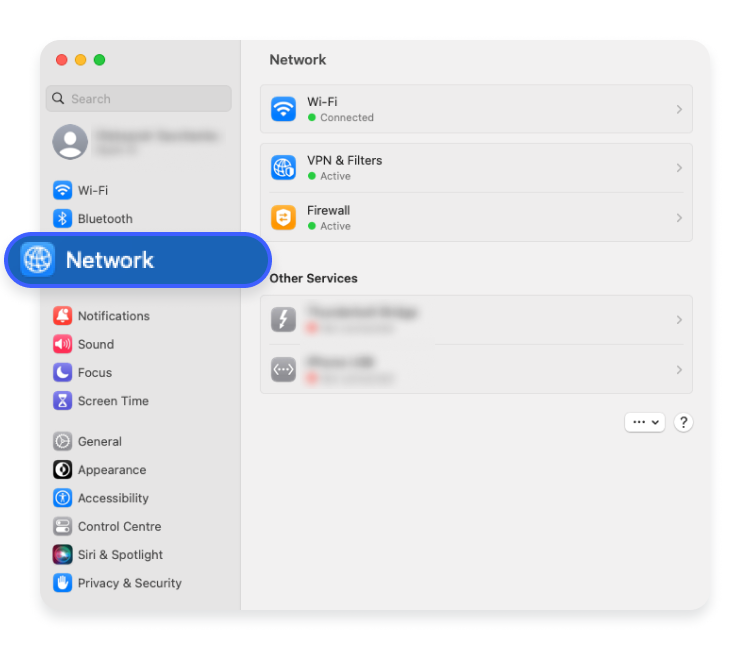
- Click “Network” and select the network you’re connected to.

- Click on “Details” — you’ll open a new window.

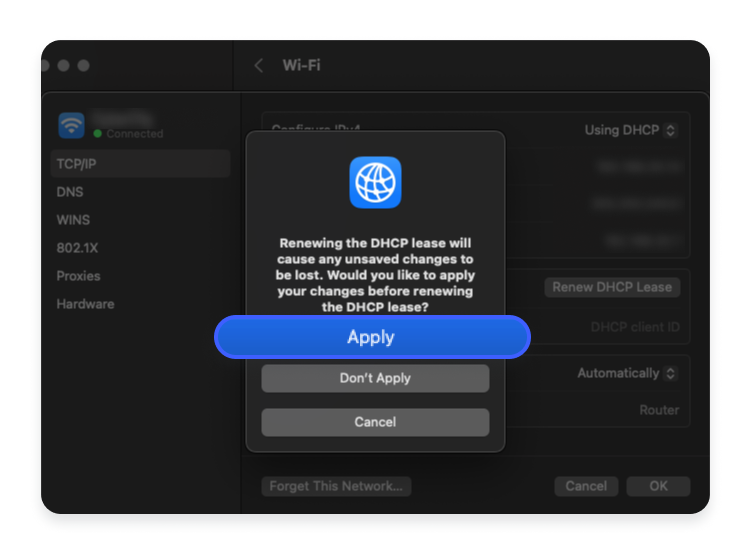
- Go to the “TCP/IP” tab, click on “Renew DHCP lease.”

- Tap “Apply” to confirm.

3. Check your network settings
- Go to “System settings” and tap on “Network.”
- Select the network connected to the self-assigned IP address.

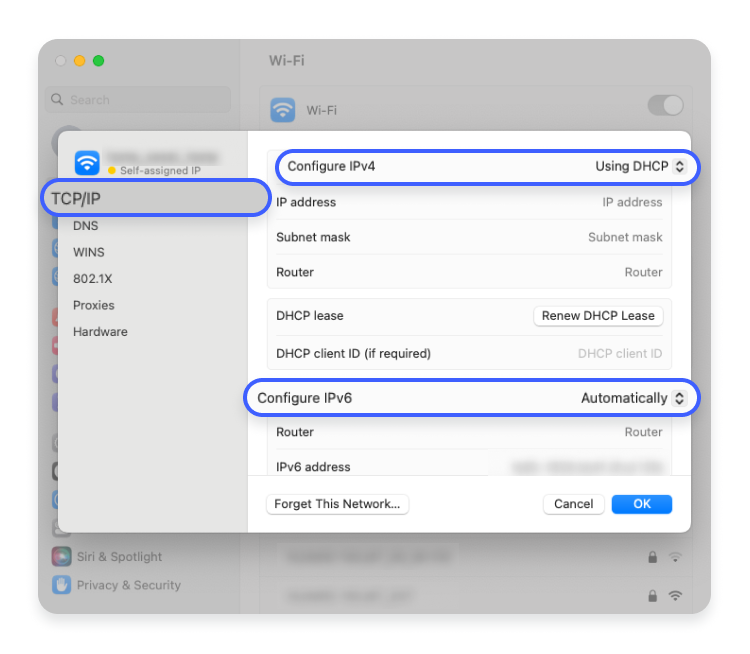
- Go to the “TCP/IP” tab and ensure that “Configure IPv4” is set to “Using DHCP” and “Configure IPv6” is set to “Automatically.”

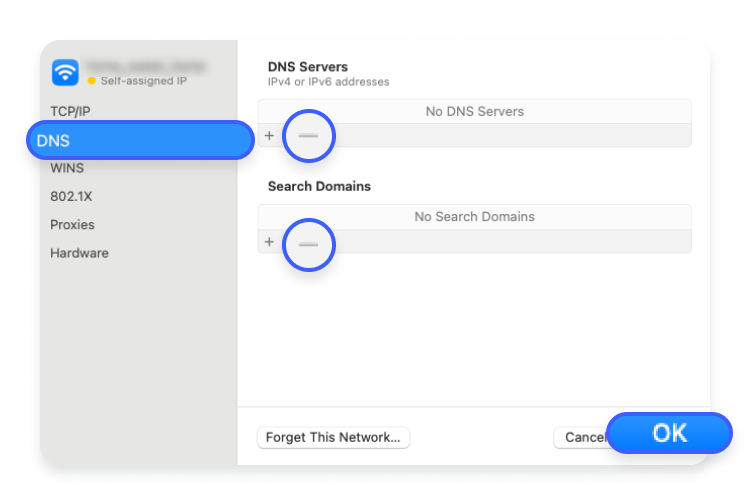
- Click on the “DNS” tab and delete the DNS servers listed there by tapping the minus button.

- Click “OK” to save the changes.
4. Create a new network location
- Click on the Apple logo, open “System settings,” and click “Network.”

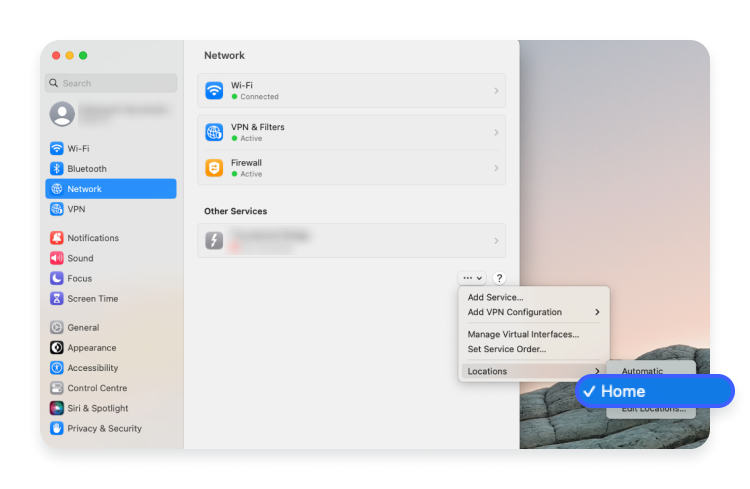
- Tap on the drop-down menu located at the bottom right corner of the window, select “Locations” and click “Edit locations.”

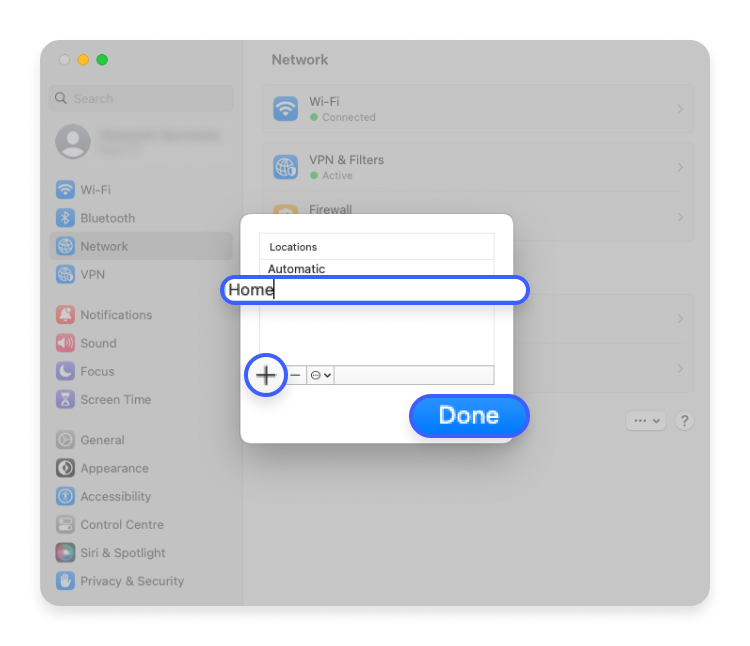
- Click on the plus (+) button to add a new location, name the location, and tap on “Done.”

- Between the two locations — “Automatic” and the new location you’ve just created — select the new location.

5. Reset Application Layer Firewall on your Mac
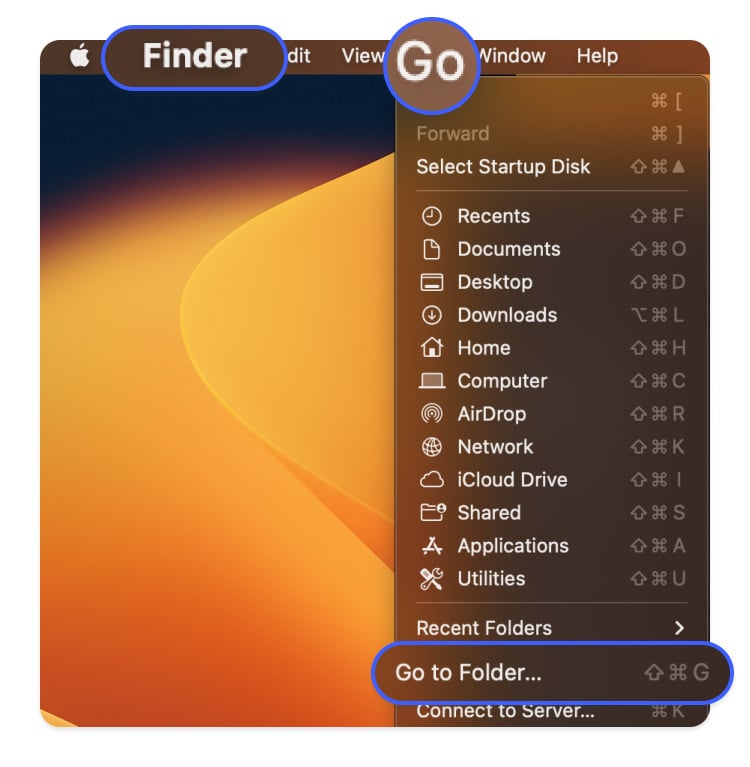
- Open the “Finder” window, click “Go,” and choose “Go to folder.”

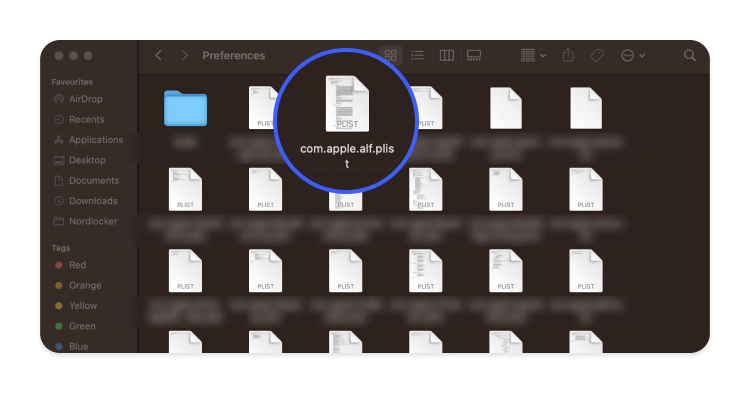
- Enter “Library/Preferences/” in the popup window.

- Choose the “com.apple.alf.plist” file in the “Preferences” folder and delete it (or place it on your desktop in case you’d like to restore the changes later).

- Restart your Mac.
Tips to prevent the IP error in the future
It’s not so hard to prevent yourself from issues obtaining an IP address. The best advice is to take constant care of your software and hardware. Below are some tips you can follow to avoid IP eros in the future:
- Always keep your MacOS up to date.
- Periodically restart your router or modem.
- Use one active network connection at a time to avoid network configuration conflicts.
- Make sure that your network drivers are up to date.
- Try using high-quality network equipment.
- Connect your Mac to the modem with an ethernet cable for a more stable connection whenever possible.
Want to read more like this?
Get the latest news and tips from NordVPN.
