VPN auto-connect feature: find out how it works
The VPN auto-connect feature automatically connects you to a VPN server so you won’t browse the internet without protection. It can safeguard your data from snoopers and hackers taking advantage of public Wi-Fi and other unsecured networks.

Contents
What is the VPN auto-connect feature?
VPN auto-connect is a feature that ensures your VPN connection is automatically established as soon as you connect to any network, including Wi-Fi, mobile networks, or Ethernet.
You can find and enable it on NordVPN’s Android, iOS, Windows, macOS, Linux, and Android TV apps.
How does the auto-connect feature work?
After you enable the auto-connect feature, you will be connected to the VPN server as soon as you launch the NordVPN application.
You can also customize the feature by choosing when you wish to initiate your VPN connection automatically:
- On Wi-Fi networks
- On Ethernet
- On mobile networks
- On all networks
You can also exclude your work or home network by adding them to trusted Wi-Fi networks. You won’t be auto-connected to VPN servers on that particular network.
Once connected, your internet traffic runs through an encrypted VPN tunnel, protecting it from hackers and unwanted snoopers.
All you have to do is set up the auto-connect feature on your VPN client once, and NordVPN will take it from there.
How to set up the automatic VPN connection
Sometimes, you may need to turn off a VPN for a little while. But at the very least, we recommend automatically connecting to a VPN on public Wi-Fi networks. Better yet, for all-around security and increased privacy, you should keep a VPN on all the time.
The best thing about the automatic VPN connection feature is that you will never have to think about it again: once you’ve set it up, you will always be safe on any network you are connected to.
Here’s how to set up an automatic VPN connection on different devices:
On Android
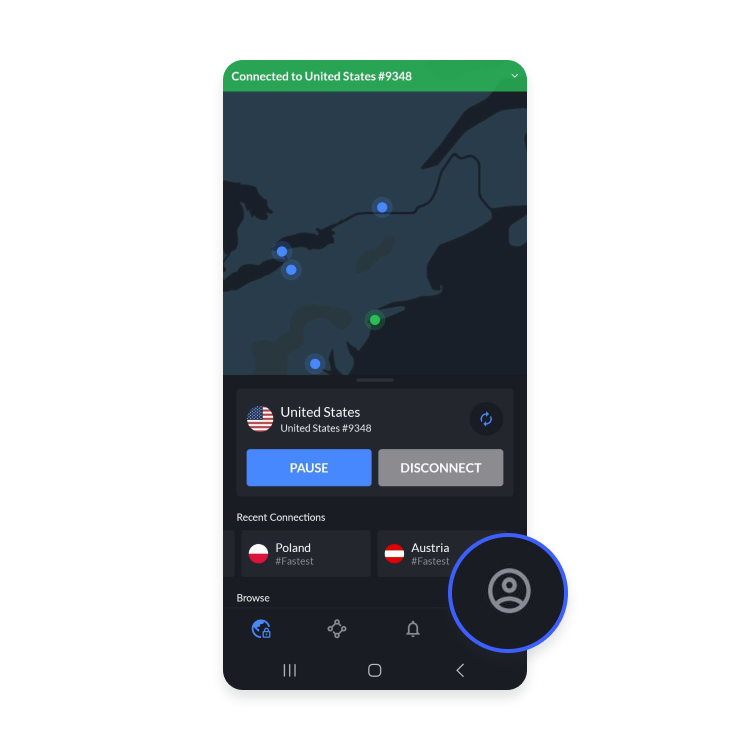
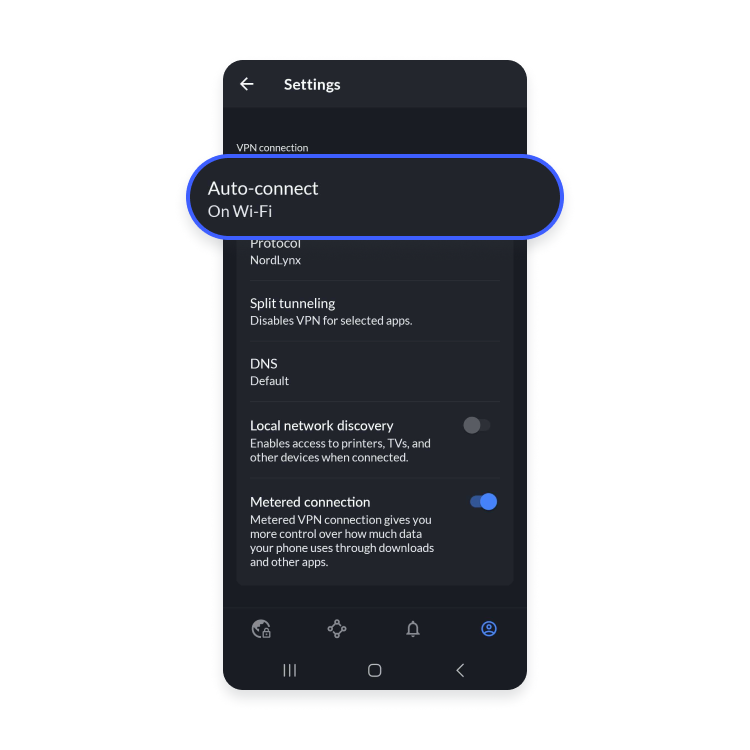
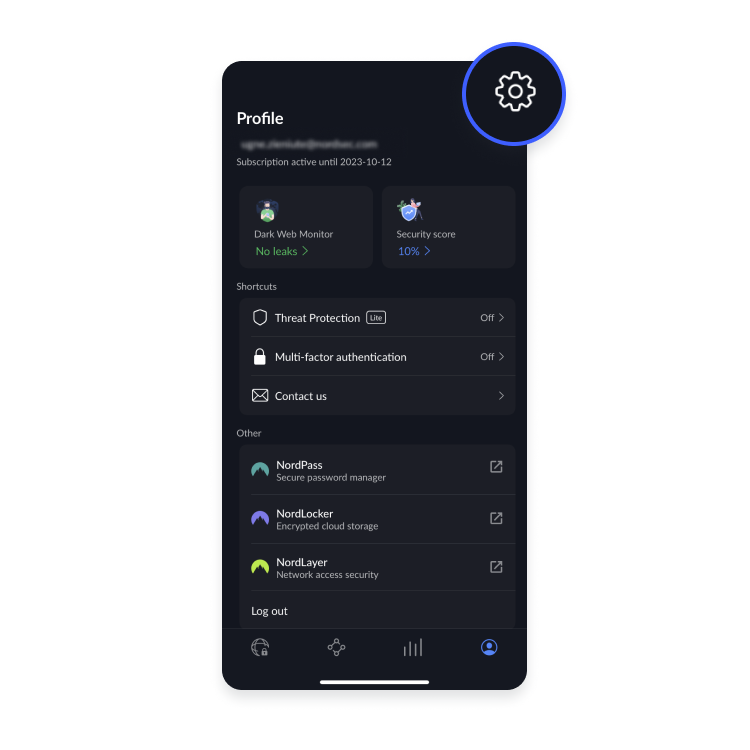
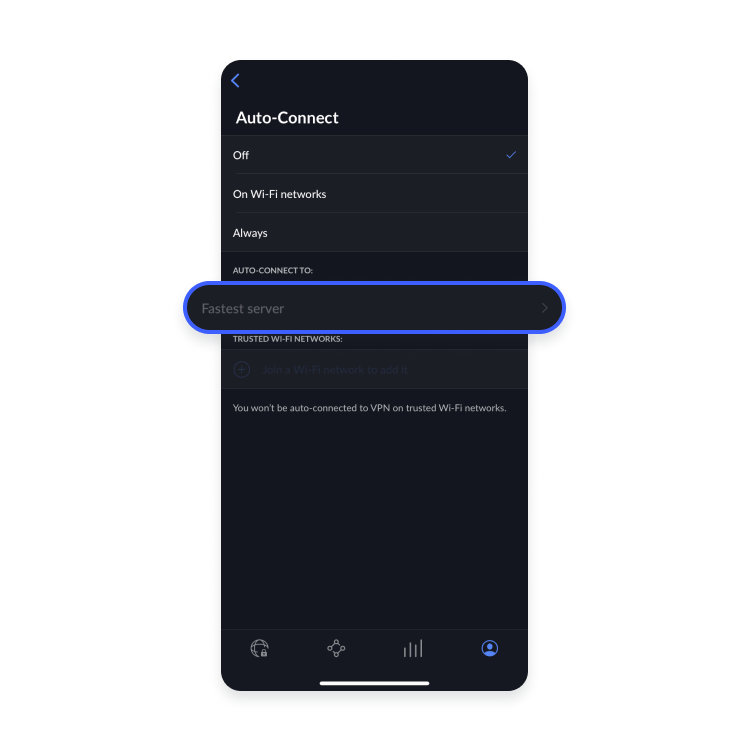
- Open the NordVPN app and tap the profile icon in the lower-right corner.

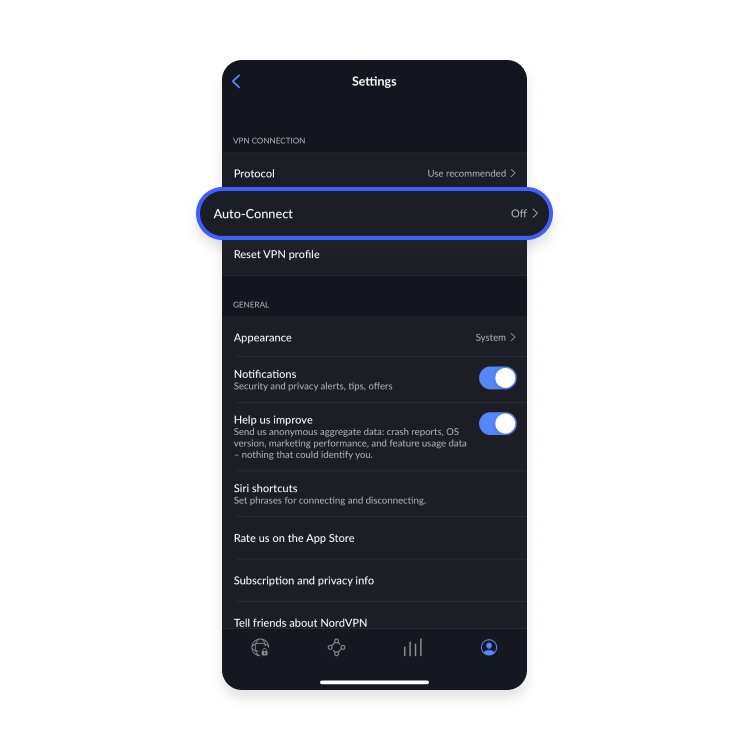
- Tap “Auto-connect.”
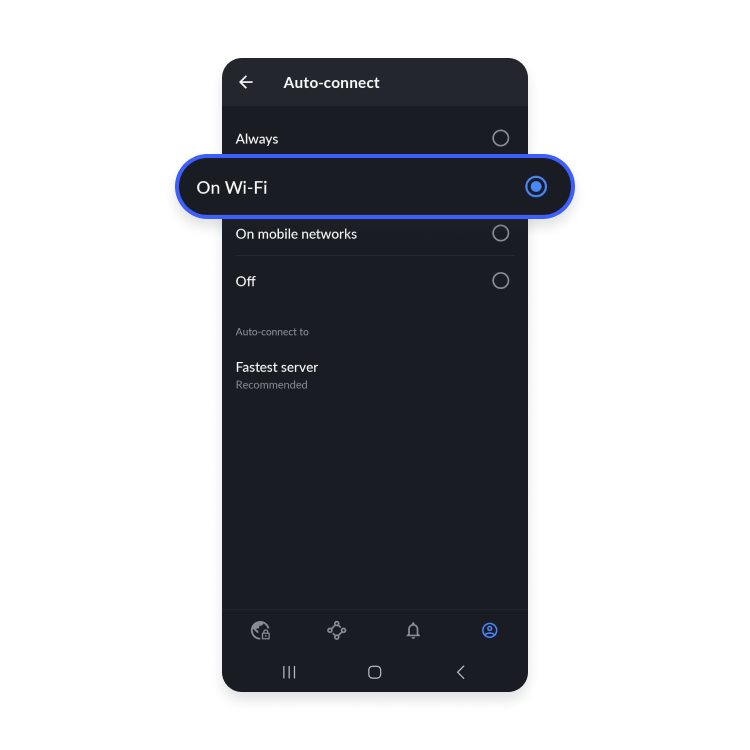
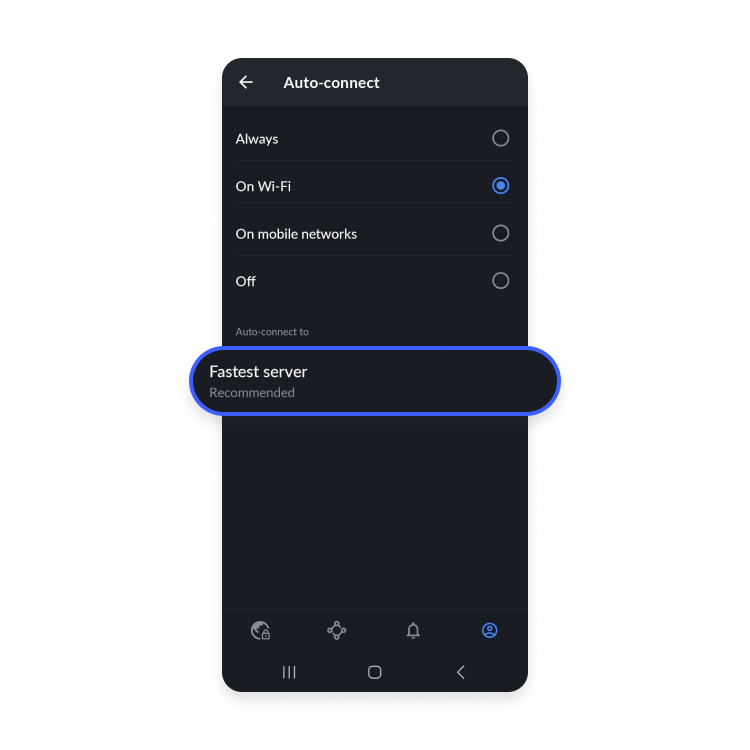
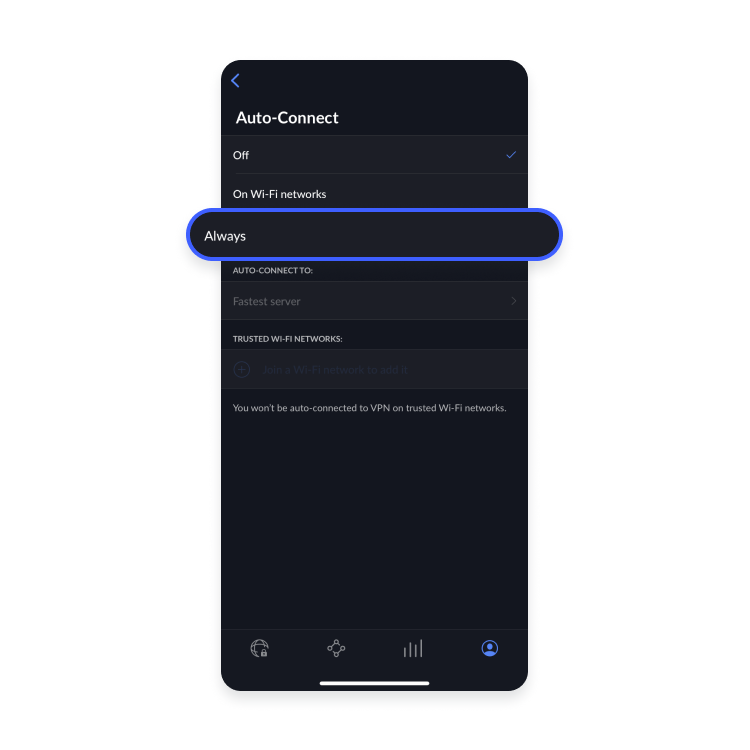
- Select if you want to enable auto-connect on Wi-Fi, mobile networks, or all networks.
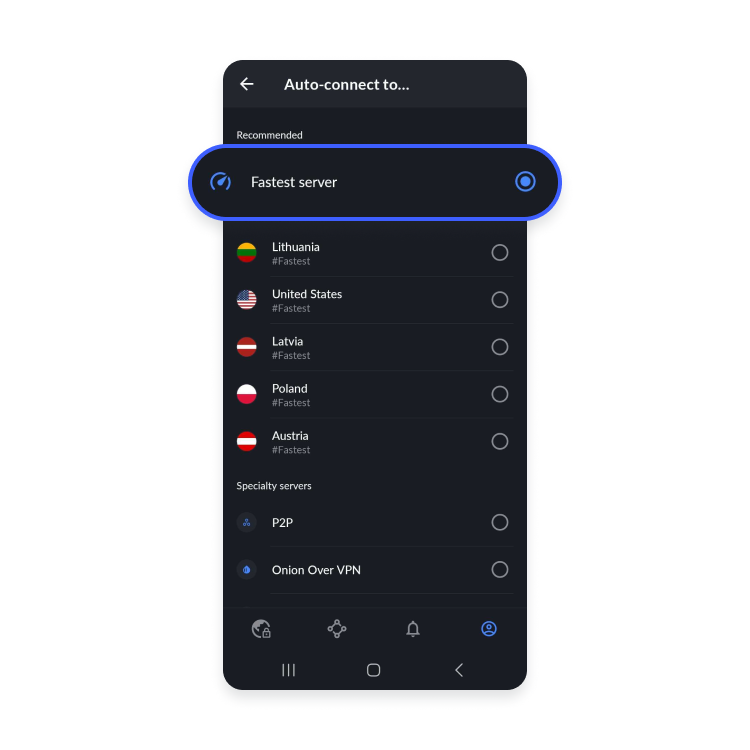
- By default, you will be connected to the fastest available server. You can change it by tapping “Fastest server” and choosing which country or specialty server you want to be connected to.
On iOS
- Open the NordVPN app and go to your profile. Tap the settings (gear) icon in the upper-right corner.
- Tap “Auto-connect.”
- Select if you want to enable auto-connect on Wi-Fi or always.
- By default, you will be connected to the fastest available server. You can change it by tapping “Fastest server” and selecting the country you want to connect to.
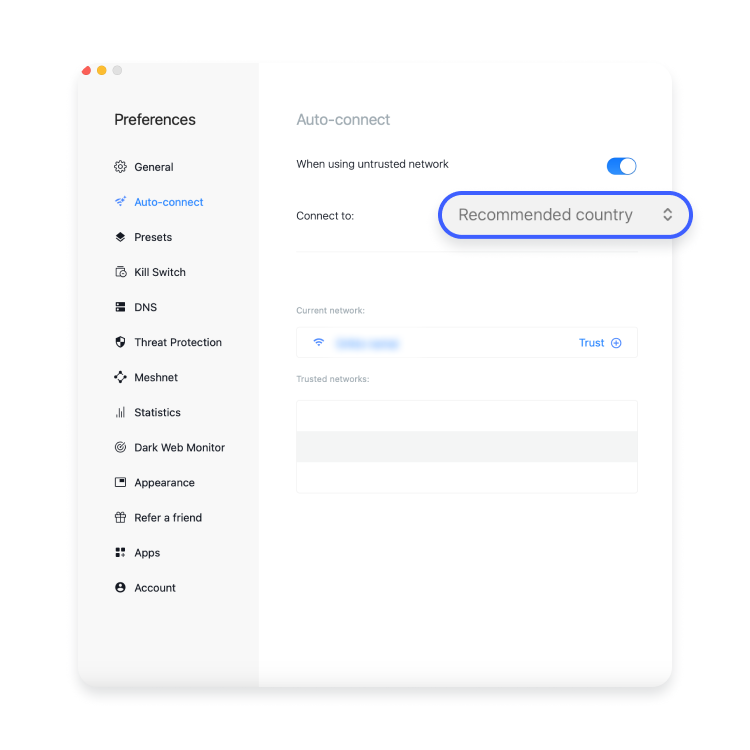
On macOS
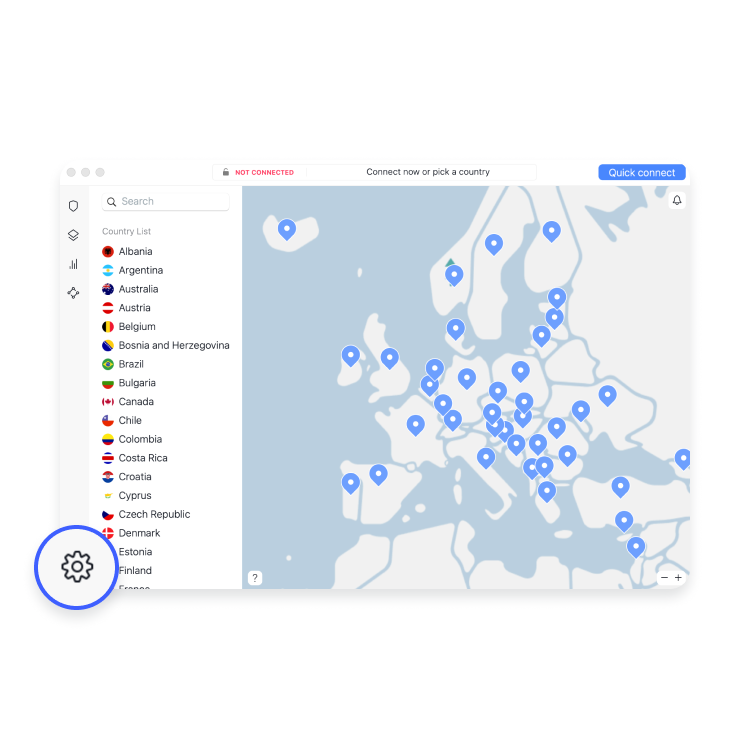
- Open the NordVPN app and click the settings (gear) icon in the bottom left corner.
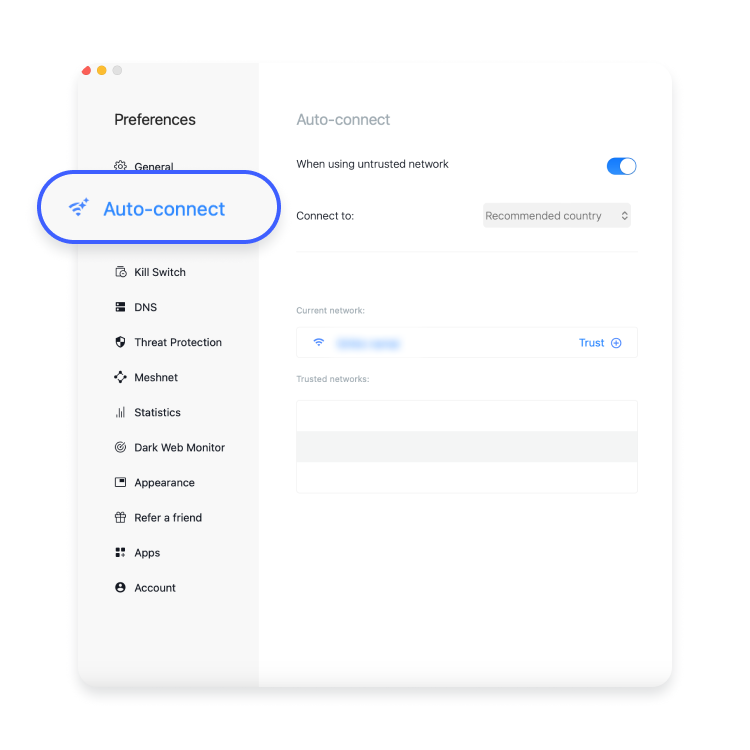
- Click on “Auto-connect” in the left-side menu.
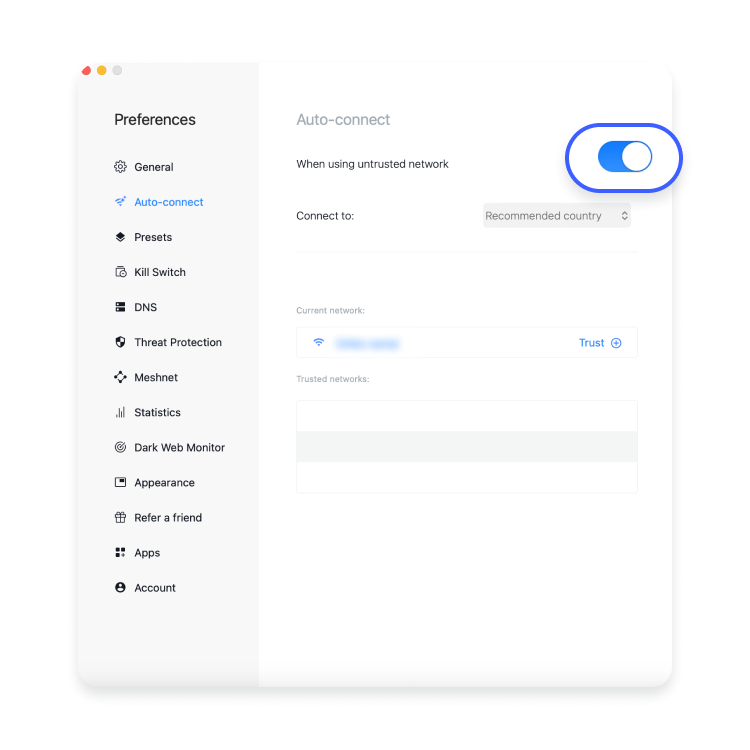
- Toggle on the button next to “When using untrusted network.”
- You can add your current network to “Trusted networks” by clicking the plus icon.
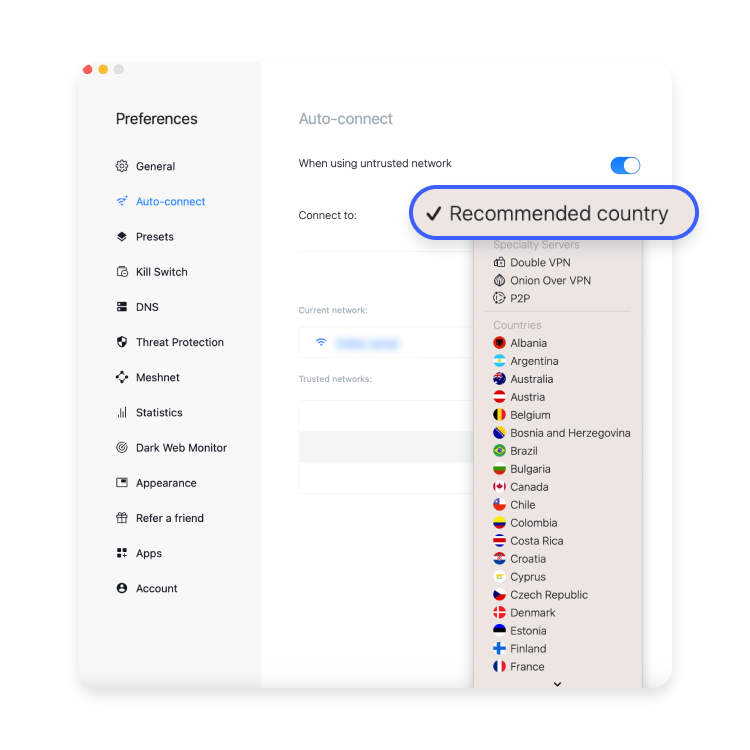
- By default, you’ll be connected to the recommended server and country. But you can also select a country or specialty server you want to connect to automatically by opening the “Connect to” drop-down menu.
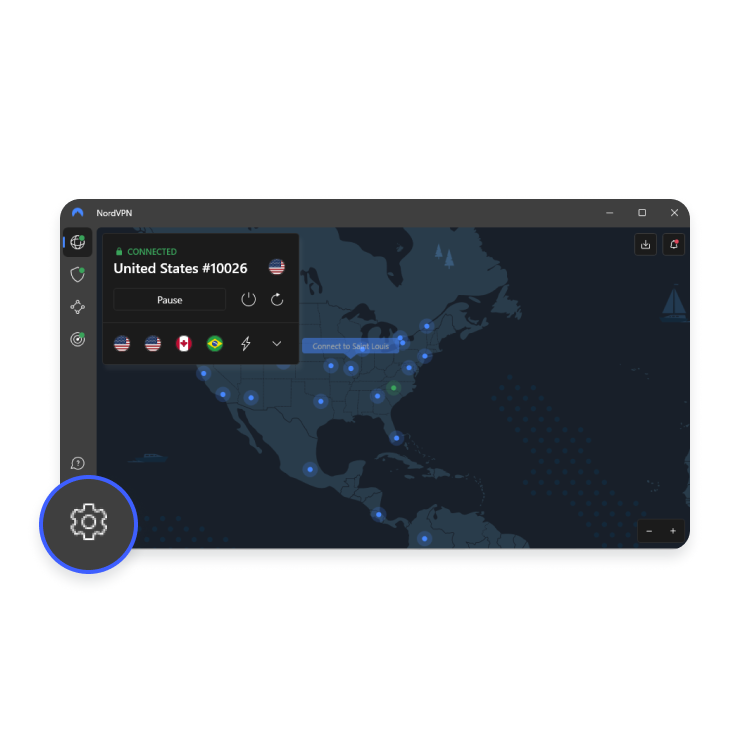
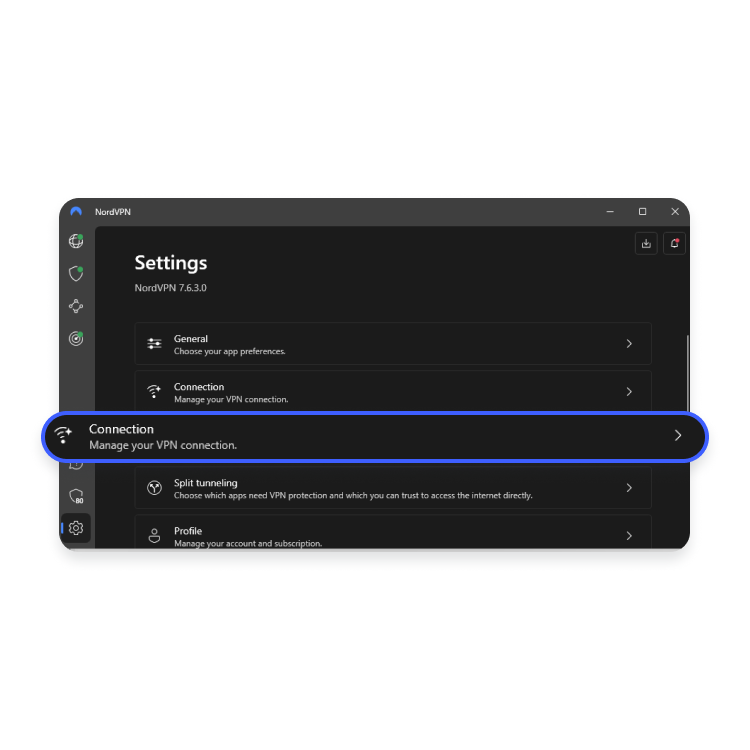
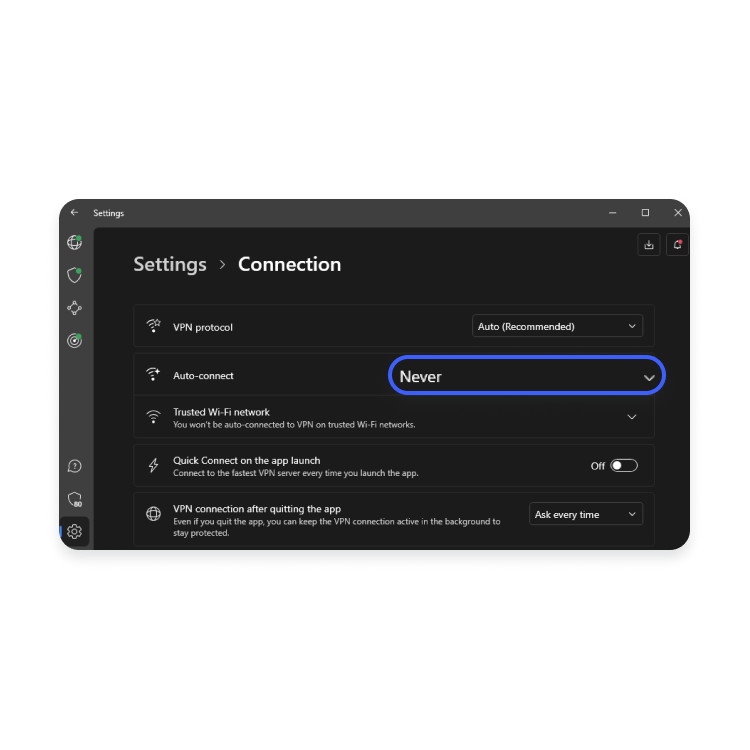
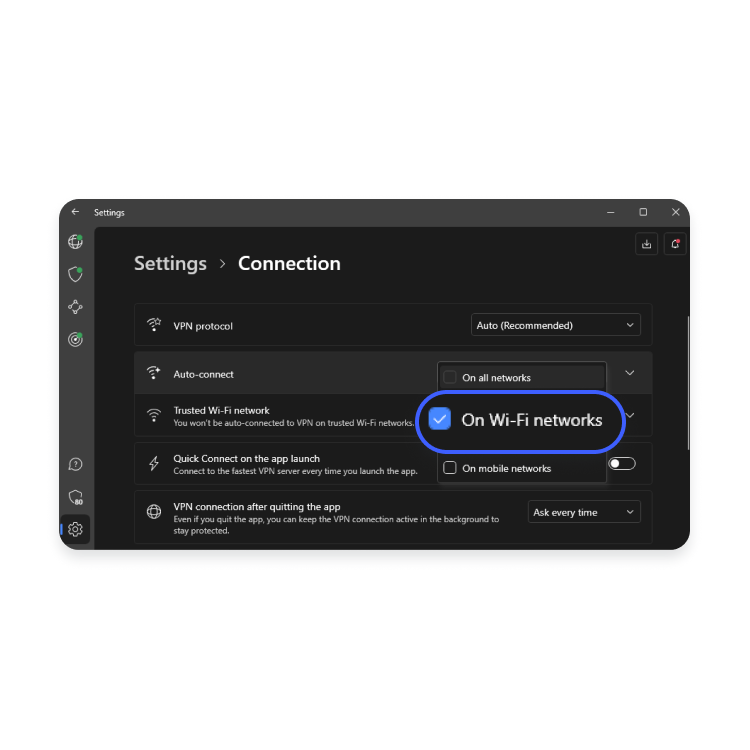
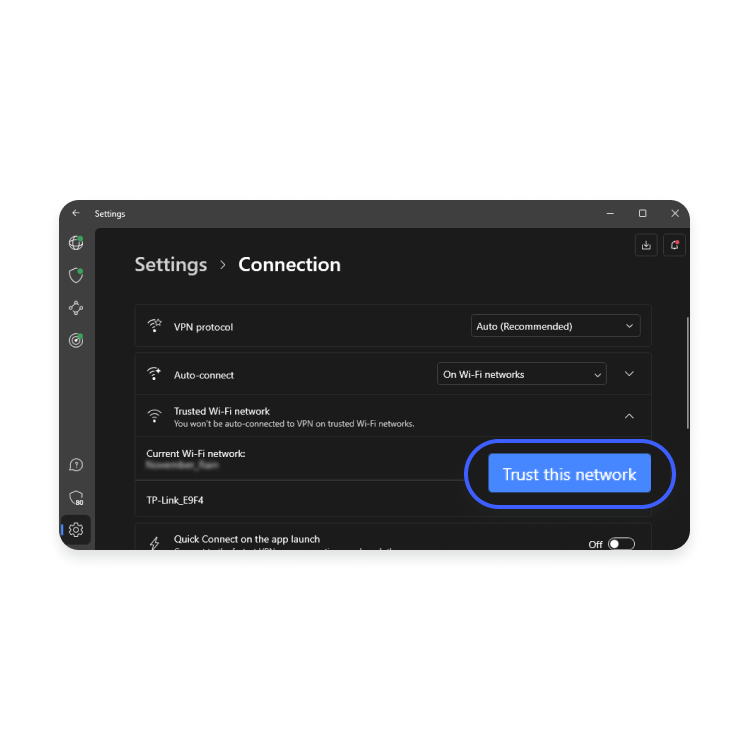
On Windows
- Open the NordVPN app and click the settings icon in the bottom left corner.
- Click on “Connection.”
- Open the drop-down menu next to “Auto-connect.”
- Select if you want to enable auto-connect on Wi-Fi, Ethernet, mobile networks, or all networks.
- You can add your current network to trusted Wi-Fi networks by clicking the “Trust this network” button.
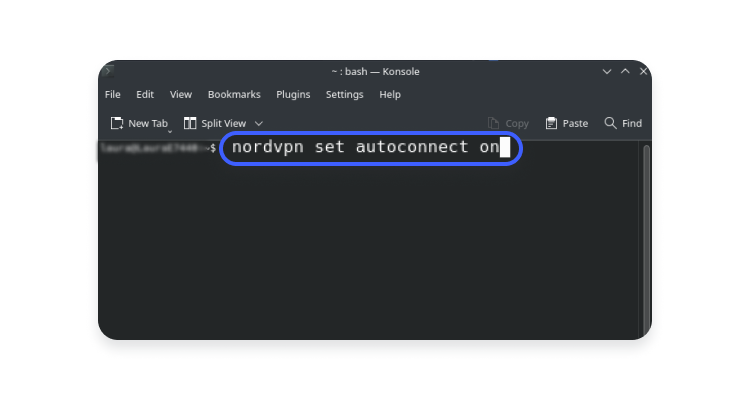
On Linux
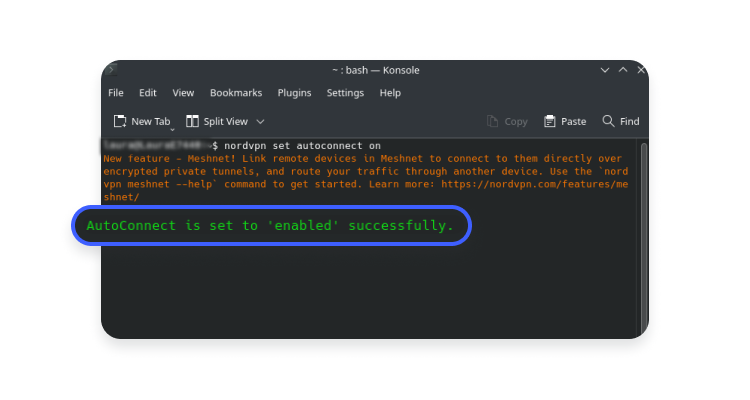
- Open the terminal and type the following command:
nordvpn set autoconnect on. You can select a specific server for automatic VPN connection usingnordvpn set autoconnect on country_code+server_number. For example,nordvpn set autoconnect on us2435. - You’ll get a disclaimer that auto-connect is enabled successfully (or it was on all along).
Why do you need a VPN on Wi-Fi networks?
Who doesn’t love free Wi-Fi? It’s convenient, saves your mobile data, and lets you enjoy internet connections free of charge. But there is also a dark side: public Wi-Fi is vulnerable to hacking.
Free hotspots often have poor router configurations and weak (if any) passwords, making them vulnerable to hacking. And security holes are not exclusive to public Wi-Fi networks — they can appear in anyone’s home if the router was set up carelessly.

Cybercriminals see public Wi-Fi networks as goldmines for stealing your data. There are numerous ways in which they can threaten your privacy:
- Man-in-the-middle (MITM) attacks. Hackers can get between your device and a web server to intercept all your online traffic and capture valuable data.
- Wi-Fi sniffing. With the help of some basic software (which is not even illegal), hackers can eavesdrop on your internet traffic running through an unsecured wireless network. Wi-Fi sniffing lets cybercriminals view the websites you visit, see the contents of forms you fill in, get your login credentials, and hijack your online accounts.
- Malware injection. Combine an unsecured wireless network with software vulnerabilities, and there you have it – the perfect target for hackers to slip malware in. Once malware gets on your operating system, it can give cybercriminals access to your files, photos, and other sensitive information.
- “Evil twin” hotspots. Hackers can set up fake hotspots and trick you into connecting to them as if they were legitimate network connections. What happens next? Hackers can see your internet traffic, capture sensitive data, such as login credentials, and even redirect you to fake banking sites to get access to your account. These hacking methods put your privacy at risk and may have severe consequences, such as identity theft.
If you don’t take protective measures, you increase your chances of falling into a cybercriminal’s trap. And make sure to regularly update your VPN app to avoid any VPN connection issues.
So enable the auto-connect feature now and forget about it – NordVPN will keep snoopers and hackers away. And don’t forget NordVPN’s other security features, including Kill Switch, Threat Protection, and Meshnet.